Physically Based Rendering Material (TGorillaPBRMaterialSource)
In v0.8.4.2314 we introduced the first version of our physically based rendering material TGorillaPBRMaterialSource which is inherited from the TGorillaPOMMaterialSource (TGorillaDefaultMaterialSource) and supports multiple lights, shadowing, fog rendering, clipping and much more.
Definiton
Physically based rendering (PBR) is a computer graphics approach that seeks to render images in a way that models the flow of light in the real world. Many PBR pipelines aim to achieve photorealism. Feasible and quick approximations of the bidirectional reflectance distribution function and rendering equation are of mathematical importance in this field. Photogrammetry may be used to help discover and encode accurate optical properties of materials. Shaders may be used to implement PBR principles.
Properties
| Property | Description |
|---|---|
| NormalMap | Normal maps are a special kind of texture that allow you to add surface detail such as bumps, grooves, and scratches to a model which catch the light as if they are represented by real geometry. This texture is used for normal-mapping and parallax occlusion mapping mode. |
| NormalIntensity | The normal intensity defines the intended depth effect. The larger the value, the more depth the algorithm is trying to produce. |
| MetalnessTexture | A Metallic, or Metalness, map, is a black and white texture that acts as a mask that defines areas on a texture set or material that behave like a metal (white) and do not (black). |
| MetallicBias | Control the metallic computation if metalness texture is not used (currently only in VolumetricRendering). |
| RoughnessTexture | The roughness map describes the surface irregularities that cause light diffusion. In this map, black (0.0) represents a smooth surface and white (1.0) represents a rough surface. The roughness map is the most creative map as it allows the artist to visually define the character of a surface. |
| RoughnessBias | Control roughness computation if roughness texture is not used (currently only in VolumetricRendering). |
| AmbientOcclusionTexture | An Ambient Occlusion (AO) map creates soft shadowing, as if the model was lit without a direct light source, like on a cloudy day. Similar map types: Cavity Map, Crevice Map, Curvature map, Dirt Map. AO is usually baked from geometry because it is created using a non-realtime ray-casting lighting solution. |
| AOBias | Control ambient occlusion computation if AO texture is not used (currently only in VolumetricRendering). |
| ParallaxOcclusionMap | If UseParallaxOcclusion is set to TRUE, you should define a parallax occlusion map from a height / displacement map. |
| ParallaxLevels | Defines the number of raytracing steps to produce a depth effect, if UseParallaxOcclusion is set to TRUE. |
| UseParallaxOcclusion | Switch between regular normal mapping or parallax occlusion mapping for depth effects. |
Normal Mapping or Parallax Occlusion Mapping
The TGorillaPBRMaterialSource is inherited from the TGorillaPOMMaterialSource and therefore offers two ways for depth effect computation: Normal-Mapping and ParallaxOcclusionMapping.
You can switch between the two modes, by setting UseParallaxOcclusion to TRUE or FALSE.
/// activate parallax occlusion mapping
/// setting UseParallaxOcclusion to FALSE will activate normal mapping.
FPBRMaterial.UseParallaxOcclusion := true;

/// further settings to control depth intensity
FPBRMaterial.ParallaxLevels := 16;
FPBRMaterial.NormalIntensity := 0.05;
If you want to know more about parallax occlusion mapping, have a closer look at the TGorillaPOMMaterialSource
Comparison
Let's have comparison on the rendering results for our specific example.
Remark: Because parallax occlusion mapping is more intense to GPU computation use it carefully. In most cases normal mapping is still good enough.
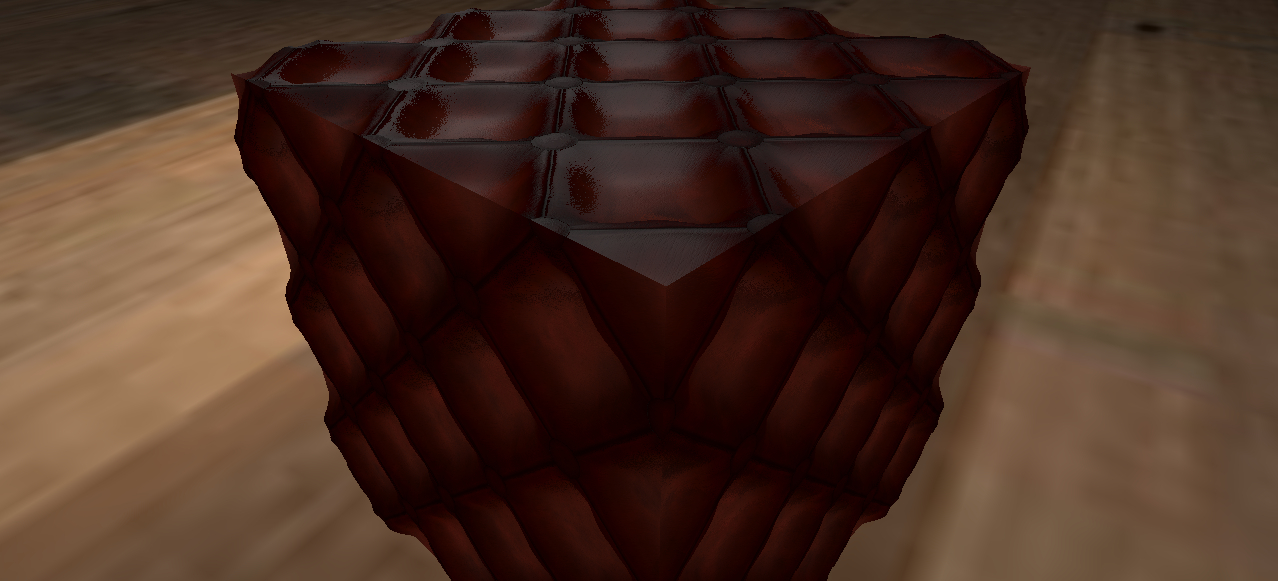
In the image below the material was rendered with parallax occlusion mapping, which is much slower than normal mapping but producing a better depth effect.
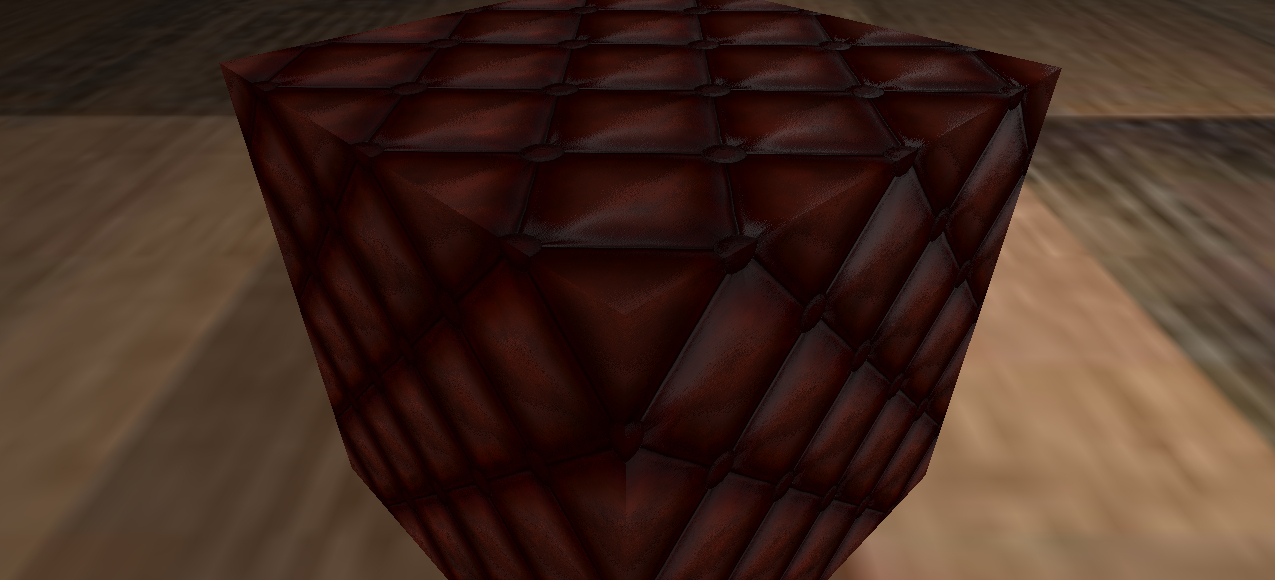
Normal-Mapping rendering produces also a quite acceptable result in our case.
Example
uses
  Gorilla.Material.PBR;

var FPBRMaterial : TGorillaPBRMaterialSource;

FPBRMaterial := TGorillaPBRMaterialSource.Create(GorillaViewport1);

/// load albedo channel texture
FPBRMaterial.Texture.LoadFromFile('older-padded-leather_albedo.png');

/// load normal map texture for some depth effect by normal mapping or parallax occlusion mapping
FPBRMaterial.NormalMap.LoadFromFile(LTexPath + 'older-padded-leather_normal-ogl.png');

/// load metallic texture
FPBRMaterial.MetalnessTexture.LoadFromFile(LTexPath + 'older-padded-leather_metallic.png');

/// load roughness texture
FPBRMaterial.RoughnessTexture.LoadFromFile(LTexPath + 'older-padded-leather_roughness.png');

/// load ambient occlusion for pre computed surface shadowing
FPBRMaterial.AmbientOcclusionTexture.LoadFromFile(LTexPath + 'older-padded-leather_ao.png');

/// configure parallax occlusion mapping for this material
FPBRMaterial.ParallaxLevels := 32;
FPBRMaterial.NormalIntensity := 0.05;
FPBRMaterial.UseParallaxOcclusion := true;
Setup Environment Mapping
For a more realistic look, it is recommended to merge the surrounding scenery color with the computed surface color. Because in real life the surrounding always reflects somehow, even if it is not obvious in first place. But to have a surrounding texture of 360° on all axis, we will need a cubemap texture. This is called environment map or reflection map.
Gorilla3D provides a simple to use render pass component TGorillaRenderPassEnvironment to build this map at runtime. You can choose between:
- Build it once: in case you have not-moving and not-changing objects
- Build it dynamically at every frame, if your scene is very dynamic
The dynamic computation is more realistic, but often not necessary and it also reduces performance a lot. Read more about environment mapping here.
uses
  Gorilla.Controller.Passes.Environment;

var FEnvironment : TGorillaRenderPassEnvironment;

/// setup the render pass component and link it to your viewport
FEnvironment := TGorillaRenderPassEnvironment.Create(GorillaViewport1);
FEnvironment.Viewport := GorillaViewport1;

/// create a quite small environment is much faster
FEnvironment.MapSize  := 512;

/// position the environment cube at the position of your PBR object.
FEnvironment.Position := GorillaCube1.Position.Point;

/// create the environment once. To create it for each frame, set the value to TRUE.
FEnvironment.IsDynamic := false;


/// Having set up our render-pass, we can now link it to our physically based rendering material
FPBRMaterial.EnvironmentPass := FEnvironment;
FPBRMaterial.Environment := true;

/// adjust the reflection intensity
FPBRMaterial.ReflectionPower := 0.75;

/// adjust the refraction intensity in case you want it to have some shining through effect
FPBRMaterial.RefractionPower := 0.25;