Inventory-System
Besides 3D features Gorilla3D also provides basic utility components like the inventory system. Most games or multimedia apps need some kind of inventory or item management.
By the TGorillaInventory component you are able to:
- manage item templates, groups and manufacturers
- hold items with thumbnail and preview models
- manage groups with thumbnails
- support a multilingual system (f.e.: for group/item names)
- have up- and downgradable items
- setup manufacturers for crafting and item combinations
- manufacture multiple items
- craft items in editable time in asynchrone backend thread
- manage max quantity of items and groups
- manage weight of items and groups
- collect items pooled or each as single instance
- collect items in dependencies, f.e. only if you have collected an ax, you can collect wood
- set variables to implement gaming elements
- set parameters to interact back with your game/application
Layout
An inventory consists of 3 basic components:
- item templates
- item groups
- manufacturers
First of all the inventory needs to know all possible items. These are called item templates. Item templates can be linked to item groups, to somehow categorize your collection. If you are interested in crafting or combining, manufacturers come in place.
Item Template
An item template holds information about the item itself. For example: a maximum global number of elements, its weight or dependencies to other items.
See in the following how you can add templates at runtime.
uses
  Gorilla.Utils.Inventory,
  Gorilla.Utils.Language;

var
  FInventory : TGorillaInventory;

procedure TForm1.FormCreate(Sender: TObject);
var LMainGrp   : TGorillaInventoryGroup;
    LAxe : TGorillaInventoryItemTemplate;
    LWood : TGorillaInventoryItemTemplate;
    LGrass : TGorillaInventoryItemTemplate;
begin
  // create inventory system
  FInventory := TGorillaInventory.Create(Self);

  // we need a first group, where the templates belong to
  LMainGrp := FInventory.AddGroup('Rucksack');

  // get the language identifiers
  LLangEN_US := GetLanguageName(GORILLA_LANG_EN_US);
  LLangDE_DE := GetLanguageName(GORILLA_LANG_DE_DE);

  // create the axe item template
  LAxe := FInventory.AddItemTemplate('Axe');
  LAxe.Group := LMainGrp;
  LAxe.ImageIndex := 4;
  // add multilingual texts
  LAxe.Name.Add(LLangEN_US, 'axe');
  LAxe.Name.Add(LLangDE_DE, 'Axt');
  // set quantity and weight values
  LAxe.MaxQuantity := 1;
  LAxe.Weight := 1;
  LAxe.MaxWeight := 1;

  // create the wood item template
  LWood := FInventory.AddItemTemplate('Wood');
  LWood.Group := LMainGrp;
  LWood.ImageIndex := 0;
  // we collect wood, but it will be stacked
  LWood.IsPooled := true;
  // add dependency to an axe - only if we have an axe collected, we can colled wood
  LWood.AddDependency(LAxe, 1);
  // add multilingual texts
  LWood.Name.Add(LLangEN_US, 'wood');
  LWood.Name.Add(LLangDE_DE, 'Holz');

  // create a grass item template
  LGrass := FInventory.AddItemTemplate('Grass');
  LGrass.Group := LMainGrp;
  LGrass.ImageIndex := 2;
  LGrass.Name.Add(LLangEN_US, 'grass');
  LGrass.Name.Add(LLangDE_DE, 'Gras');
end;
Item Group
As seen above we can simply add item groups at runtime and attach them to items.
LMainGrp := FInventory.AddGroup('Rucksack');
LWood.Group := LMainGrp;
Manufacturer
Manufacturers allow us to craft, combine or up-/downgrade items. As mentioned also this resulting items need to be registered as templates in the inventory.
Crafting
  LFire : TGorillaInventoryItemTemplate;
  LMan : TGorillaInventoryManufacturer;

  [...]

  // register the resulting fire item template
  LFire := FInventory.AddItemTemplate('Fire');
  LFire.Group := LMainGrp;
  LFire.ImageIndex := 3;
  LFire.Name.Add(LLangEN_US, 'fire');
  LFire.Name.Add(LLangDE_DE, 'Feuer');

  // add a new manufacturer
  LMan := FInventory.AddManufacturer('Campfire');

  // setup a time for how long the manufacturing process takes (in milliseconds)
  LMan.TimeNeeded := 10000;

  // add items which are necessary to build a result item
  LMan.AddIngredient(LWood, 3);
  LMan.AddIngredient(LGrass, 1);

  // set the resulting item template
  LMan.ResultItem.Template := LFire;
Combining
Combining items works the same way like crafting. The only difference is the used time. While crafting expects a predefined time span, combining should work immediatly.
So simply set TimeNeeded property on manufacturer construction to less-equal zero.
LMan.TimeNeeded := 0;
The Manufacture() method will then not start an async thread for construction, instead it will directly build the new item.
Up-/Downgrading
To allow up-/downgrading simple link each template to the other.
  // register the upgrade item template
  LChimney := FInventory.AddItemTemplate('Chimney');
  LChimney.Group := LMainGrp;
  LChimney.ImageIndex := 6;
  LChimney.Name.Add(LLangEN_US, 'chimney');
  LChimney.Name.Add(LLangDE_DE, 'Kamin');

  // link with fire template for possible downgrade
  LChimney.DowngradeItem := LFire;

  // link with chimney template for possible upgrade
  LFire.UpgradeItem := LChimney;
To downgrade we call the Downgrade() method with the specific collected item:
procedure TForm1.MenuItem8Click(Sender: TObject);
var LColl : TGorillaInventoryCollectable;
begin
  // downgrade the item
  LColl := PopUpMenu1.TagObject as TGorillaInventoryCollectable;
  if not Assigned(LColl) then
    Exit;

  // check if the item is downgradable
  if LColl.IsDowngradable() then
    FInventory.Downgrade(LColl)
  else
    ShowMessage('Collected item not downgradable!');
end;
Equivalent to downgrading we call Upgrade() with the specific collected item to level up our item:
procedure TForm1.MenuItem7Click(Sender: TObject);
var LColl : TGorillaInventoryCollectable;
begin
  // upgrade the item
  LColl := PopUpMenu1.TagObject as TGorillaInventoryCollectable;
  if not Assigned(LColl) then
    Exit;

  // Check if the item is upgradable
  if LColl.IsUpgradable() then
    FInventory.Upgrade(LColl)
  else
    ShowMessage('Collected item not upgradable!');
end;
Multilingual
The component supports multilingual text content for your items and groups names. To set the value for a specific language we need the language-name, requested by GetLanguageName() function. By this index we can set a multilingual name for the item as shown below:
uses
  Gorilla.Utils.Language;

var LLangEN_US,
    LLangDE_DE : String;

  LLangEN_US := GetLanguageName(GORILLA_LANG_EN_US);
  LLangDE_DE := GetLanguageName(GORILLA_LANG_DE_DE);

  [...]
  LAxe.Name.Add(LLangEN_US, 'axe');
  LAxe.Name.Add(LLangDE_DE, 'Axt');
In the inventory component itself we can set the active language. This is the base setting for auto-language detection by the user-interface.
FInventory.Language := GORILLA_LANG_EN_US;
FIFrame.UpdateInventory();
Currently supported languages are:
| ID | Language |
|---|---|
| GORILLA_LANG_EN_US | english |
| GORILLA_LANG_EN_UK | english |
| GORILLA_LANG_DE_DE | german |
| GORILLA_LANG_DE_AT | german |
| GORILLA_LANG_DE_CH | german |
Collect
Collecting items is the most used feature of the inventory component running your app. Due to settings it is not always possible to really collect an item. Imagine, you already have 10 blocks of wood and the maximum is reached.
Until you can collect an item you'll need the item template to supply to the Collect() method. Afterwards the method will output a state value, telling you if collecting was successful.
Take a look at the following code:
procedure TForm1.Button1Click(Sender: TObject);
var LIdx  : Integer;
    LTemp : TGorillaInventoryItemTemplate;
    LState : TGorillaInventoryCollectState;
begin
  // select a specific item template from a combobox
  LIdx := TemplateSelector.ItemIndex;
  if (LIdx < 0) then
    Exit;

  LTemp := TemplateSelector.Items.Objects[LIdx] as TGorillaInventoryItemTemplate;

  // run the collecting process
  FInventory.Collect(LTemp, LState);

  // check feedback
  if (LState <> TGorillaInventoryCollectState.Collected) then
  begin
    ShowMessage('Not collected: ' +
      GetEnumName(TypeInfo(TGorillaInventoryCollectState), Ord(LState)));
    Exit;
  end;

  // update the user-interface
  FIFrame.UpdateInventory();
end;
Drop
In some cases you'll need a method to release collected items from your inventory. Maybe you have a weight managed inventory and need more space, or you just lose an items due to some story event in your game.
procedure TForm1.MenuItem6Click(Sender: TObject);
var LColl  : TGorillaInventoryCollectable;
    LCount : Integer;
begin
  // get the collected item you want to release
  LColl := [...]

  // check if it is a pooled item and we want to release all of it
  LCount := -1;
  if LColl.Template.IsPooled then
  begin
    if (FMX.DialogService.Sync.TDialogServiceSync.MessageDialog(
      'Would you like to drop all instances of that item?',
      TMsgDlgType.mtConfirmation, [TMsgDlgBtn.mbYes, TMsgDlgBtn.mbNo], TMsgDlgBtn.mbYes, 0) = mrNo) then
    begin
      LCount := 1;
    end;
  end;

  // drop the item with a supplied count of it
  FInventory.DropCollectedItem(LColl, LCount);

  // update the user-interface
  FIFrame.UpdateInventory();
end;
Manufacture
Manufacture manually
Manually means, you are selecting the itended manufacturer and supply a number of collected items. The Manufacture() method will return a process instance and start building. Depending on your settings this can take some time. Because in most cases you'd like to simulate realistic manufacturing.
You will receive nil as result of Manufacture() if ingredients are missing or supplied items are not suitable.
procedure TForm1.Button4Click(Sender: TObject);
var LMan  : TGorillaInventoryManufacturer;
    LProc : TGorillaInventoryManufacturingProcess;
begin
  // manufacture with a specific manufacturer
  if Assigned(ManufacturerSelector.Selected) then
  begin
    LMan := ManufacturerSelector.Selected.Data as TGorillaInventoryManufacturer;
    if Assigned(LMan) then
    begin
      LProc := FInventory.Manufacture(LMan, FInventory.CollectedItems.ToArray());
      if not Assigned(LProc) then
      begin
        ShowMessage('Some ingredients missing!');
      end;
    end;
  end
  else ShowMessage('Please select a manufacturer at first.');
end;
Manufacture automatically
The Gorilla3D inventory component allows to automatically manufacture items by a supplied array of items. This means: It will automatically detect the first suitable manufacturer by the provided items and start the process.
The method returns a process instance in case the manufacturing was started.
procedure TForm1.Button2Click(Sender: TObject);
var LProc : TGorillaInventoryManufacturingProcess;
begin
  // start manufacturing process by automatically detecting
  LProc := FInventory.Manufacture(
    FInventory.CollectedItems.ToArray()
    );

  // if result was nil, no suitable manufacturer could be found
  if not Assigned(LProc) then
  begin
    ShowMessage('Some ingredients missing!');
  end;
end;
UserInterface
The inventory component is a non-visual component which needs an user-interface to make your items visible. You can extend the TInventoryFrame, TInventoryGroup and TInventoryCollectedItem [Gorilla.UI.Inventory] component to build your own user-interface.
| Class | Description |
|---|---|
| TInventoryFrame | A custom inventory frame component to manage a inventory system. |
| TInventoryGroup | A inventory grouping component. Use this component to categorize your collected items into groups. |
| TInventoryCollectedItem | A custom collected item component. Use this component as basis for all of your collected items. |
Visual Items
To allow better abstraction and separation between the logical and the visual part of an inventory, we introduced visual items in v0.8.3.1812+. You can now define 3 levels of detail plus a model filename for each visual item. (This may be extended in future releases.)
A visual item standalone entity inside of the inventory component and can be freely linked by image-index of each item template. You can also link different item templates to the same visual item.
To add a visual item at runtime, use the following code:
/// add a visual representation for an axe
GorillaInventory1.AddVisualItem(0, 'Item1', 'item1_lod0.png', 'item1_lod1.png', 'item1_lod2.png', 'axe.obj');

/// add a visual representation for a pickaxe
GorillaInventory1.AddVisualItem(1, 'Item2', 'item2_lod0.png', 'item2_lod1.png', 'item2_lod2.png', 'pickaxe.obj');
To remove a visual item, use:
/// add a visual representation for an axe
GorillaInventory1.RemoveVisualItem('Item1');
This is also the first step to work together with asset packages. At the moment you can use the “OnLoadResource” callback event of your inventory component. This is getting called on each visual item resource request.
[...]

/// define callback event for assets loading
GorillaInventory.OnLoadResource := DoOnInventoryLoadResource;

[...]

procedure TForm1.DoOnInventoryLoadResource(const AInventory : TGorillaInventory;
    const AResIdx : Integer; const AResource : String;
    const AItem : TGorillaInventoryVisualItem; const ADestBitmap : TBitmap);
var LPckg : TGorillaAssetsPackage;
    LAsset : TGorillaAsset;
    LBmp : FMX.Graphics.TBitmap;
begin
  /// get your package previously created
  LPckg := GorillaAssetsManager1.GetPackage('InMemory');
  if not Assigned(LPckg) then
    raise Exception.Create('package "InMemory" not found');

  /// try to find an asset by resource filename + extension
  LAsset := LPckg.FindAsset(AResource);
  if not Assigned(LAsset) then
    raise Exception.CreateFmt('asset "%s" not found', [AResource]);

  /// check if it really is a texture / image asset
  if not (LAsset is TGorillaTextureAsset) then
    raise Exception.CreateFmt('asset "%s" not a valid texture asset', [AResource]);

  /// copy the image to inventory image (duplication!)
  LBmp := TGorillaTextureAsset(LAsset).GetBitmap();
  try
    ADestBitmap.Assign(LBmp);
  finally
    FreeAndNil(LBmp);
  end;
end;
Inventory-Designer
We offer a free ui-tool for easy inventory design. You can save your designed inventory to file and load it in your application.
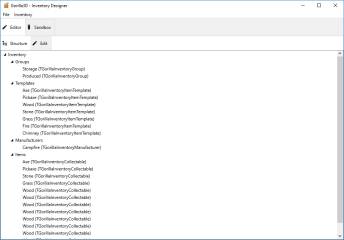
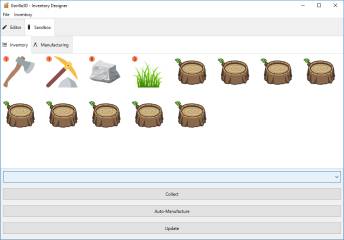
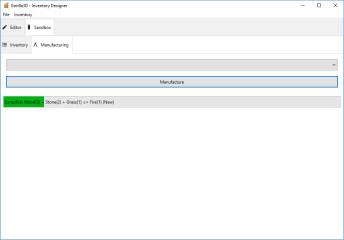
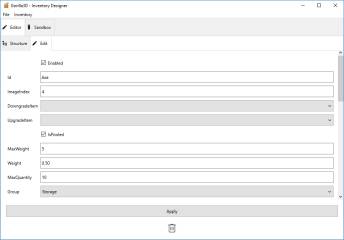
The tool provides a sandbox mode, where you can test your item and manufacturer settings directly.
Inventory-Files are also supported in AssetsManager packages.
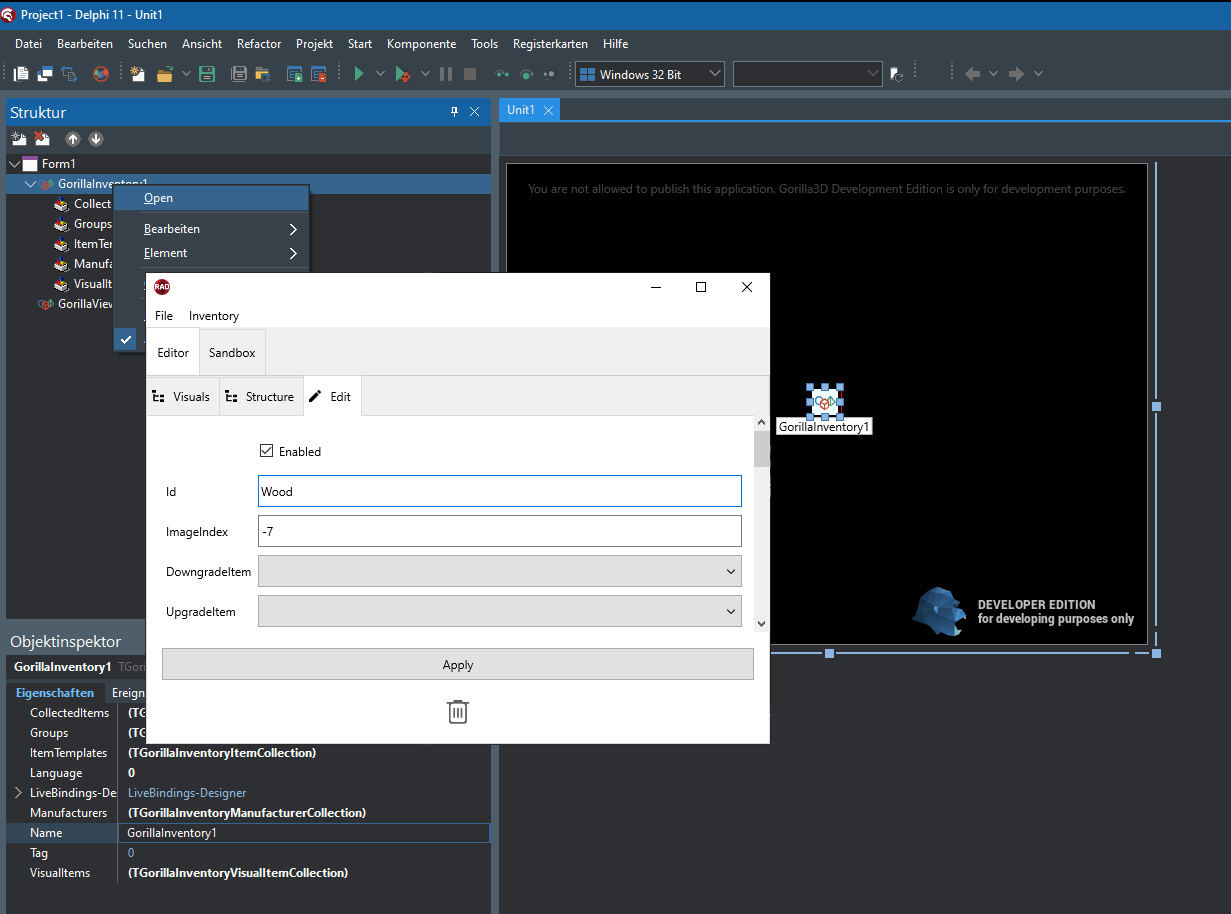
DesignTime Editor
With v0.8.4+ we've added a design time editor for an inventory component.
You can design your inventory inside the designtime editor, but you cannot store it in the DFM structure of your form. Due to a Bug, it will store a property “Group.Id” which cannot be resolved on loading at runtime.
We recommend to use the editor to design and save as file. Load this file at runtime.
Next step: Dialogues