Character Controlling
For most games or apps a character / camera controlling is necessary to move in 3D space. This section handles firstperson- and thirdperson character controlling and all expandable components. The framework makes it very easy to implement such behaviour. Without huge coding you can setup everything at design-time.
The TGorillaCharacterController is the basis class for TGorillaFirstPersonController and TGorillaThirdPersonController, but should not be used directly, because it's only an abstraction layer for shared functionality.
All character controllers receive inputs from a TGorillaInputController instance. By those inputs a linked camera component will be moved or users are allowed to interact with your game.
Hotkeys
Because we've linked an input controller to the character controller, we have to define hotkeys to react on.
In short this means: if the input controller detects a hotkey, it will forward the event to the character controller. And then the character controller will react on the hotkey event by a specific operation, like moving forward or shooting.
By default the character controllery already defines standardized hotkeys, like W-A-S-D for movement. But you're allowed to overwrite those hotkeys by your own.
Predefined input hotkeys by the TGorillaCharacterController class are:
Predefined
| NAME | CODE | DEVICE |
|---|---|---|
| KEY_FORWARD | GORILLA_INPUT_KEY_W | Keyboard |
| KEY_BACKWARD | GORILLA_INPUT_KEY_S | Keyboard |
| KEY_LEFT | GORILLA_INPUT_KEY_A | Keyboard |
| KEY_RIGHT | GORILLA_INPUT_KEY_D | Keyboard |
| KEY_JUMP | GORILLA_INPUT_KEY_SPACE | Keyboard |
| KEY_CROUCH | GORILLA_INPUT_KEY_CTRL_LEFT | Keyboard |
| KEY_CRAWL | GORILLA_INPUT_KEY_ALTGR | Keyboard |
| KEY_BOOST | GORILLA_INPUT_KEY_SHIFT_LEFT | Keyboard |
| KEY_AIM | GORILLA_INPUT_KEY_ALT | Keyboard |
| KEY_CUSTOM1 | Code: GORILLA_INPUT_KEY_Q | Keyboard |
| KEY_CUSTOM2 | Code: GORILLA_INPUT_KEY_E | Keyboard |
| KEY_CUSTOM3 | Code: GORILLA_INPUT_KEY_F | Keyboard |
| KEY_CUSTOM4 | Code: GORILLA_INPUT_KEY_C | Keyboard |
| KEY_START | Code: GORILLA_INPUT_KEY_ESCAPE | Keyboard |
| KEY_MODE | Code: GORILLA_INPUT_KEY_PAUSE | Keyboard |
| KEY_BACK | Code: GORILLA_INPUT_KEY_SHIFT_BACKSPACE | Keyboard |
| KEY_MENU_UP | GORILLA_INPUT_KEY_ARROW_UP | Keyboard |
| KEY_MENU_DOWN | GORILLA_INPUT_KEY_ARROW_DOWN | Keyboard |
| KEY_MENU_LEFT | GORILLA_INPUT_KEY_ARROW_LEFT | Keyboard |
| KEY_MENU_RIGHT | GORILLA_INPUT_KEY_ARROW_RIGHT | Keyboard |
| MOUSE_LEFTBUTTON | GORILLA_INPUT_MOUSE_LBUTTON | Mouse |
| MOUSE_MIDDLEBUTTON | GORILLA_INPUT_MOUSE_MBUTTON | Mouse |
| MOUSE_RIGHTBUTTON | GORILLA_INPUT_MOUSE_RBUTTON | Mouse |
| GAMEPAD_MOVE | 0 | GamePad |
| GAMEPAD_MOVE_FORWARD | GORILLA_INPUT_GAMEPAD_DPAD_UP | GamePad |
| GAMEPAD_MOVE_BACKWARD | GORILLA_INPUT_GAMEPAD_DPAD_DOWN | GamePad |
| GAMEPAD_MOVE_LEFT | GORILLA_INPUT_GAMEPAD_DPAD_LEFT | GamePad |
| GAMEPAD_MOVE_RIGHT | GORILLA_INPUT_GAMEPAD_DPAD_RIGHT | GamePad |
| GAMEPAD_JUMP | GORILLA_INPUT_GAMEPAD_SHOULDER_RIGHT | GamePad |
| GAMEPAD_CROUCH | GORILLA_INPUT_GAMEPAD_THUMBSTICK_RIGHT | GamePad |
| GAMEPAD_CRAWL | GORILLA_INPUT_GAMEPAD_THUMBSTICK_LEFT | GamePad |
| GAMEPAD_BOOST | GORILLA_INPUT_GAMEPAD_SHOULDER_LEFT | GamePad |
| GAMEPAD_AIM | GORILLA_INPUT_GAMEPAD_THUMBSTICK_LEFT | GamePad |
| GAMEPAD_BUTTONA | GORILLA_INPUT_GAMEPAD_BUTTON_A | GamePad |
| GAMEPAD_BUTTONB | GORILLA_INPUT_GAMEPAD_BUTTON_B | GamePad |
| GAMEPAD_BUTTONX | GORILLA_INPUT_GAMEPAD_BUTTON_X | GamePad |
| GAMEPAD_BUTTONY | GORILLA_INPUT_GAMEPAD_BUTTON_Y | GamePad |
| GAMEPAD_START | GORILLA_INPUT_GAMEPAD_STARTBUTTON | GamePad |
| GAMEPAD_MODE | GORILLA_INPUT_GAMEPAD_MODEBUTTON | GamePad |
| GAMEPAD_BACK | GORILLA_INPUT_GAMEPAD_BACKBUTTON | GamePad |
| GAMEPAD_MENU_UP | GORILLA_INPUT_GAMEPAD_DPAD_UP | GamePad |
| GAMEPAD_MENU_DOWN | GORILLA_INPUT_GAMEPAD_DPAD_DOWN | GamePad |
| GAMEPAD_MENU_LEFT | GORILLA_INPUT_GAMEPAD_DPAD_LEFT | GamePad |
| GAMEPAD_MENU_RIGHT | GORILLA_INPUT_GAMEPAD_DPAD_RIGHT | GamePad |
Remark: All available input codes are defined in Gorilla.Controller.Input.Consts.pas.
Modification
Axis Movement
The default character controllers only move along the X and Z axis.
You can enable or disable axis movement by the lock properties:
| Property | Description |
|---|---|
| LockXAxis | Lock or unlock X-axis for movement. Enable this property if you don't want the character to force movement on x direction. |
| LockYAxis | Lock or unlock Y-axis for movement. Enable this property if you don't want the character to force movement on y direction. |
| LockZAxis | Lock or unlock Z-axis for movement. Enable this property if you don't want the character to force movement on Z direction. |
Even if we unlock it, up and down movement along the y-axis is still not possible by default. There's no interaction with the underlying area.
You can implement that yourself by OnMove and OnRotate event
Speed
In case movement or rotation speed does not suit your needs. You can of course modify those values, too.
| Property | Description |
|---|---|
| Speed | Get or set speed of movement. A basis speed value applied to direction vector. Default value is 1.0. |
| RunningSpeedBoost | Boost factor on speed if state is fpBoost. Values between 1-1000 are allowed. Default value is 2.0. |
| MouseControllerSpeed | Get or set mouse speed. The value controls camera rotation speed. Default value is 0.075. |
| GamePadThumbstickSpeed | Get or set gamepad controller thumbstick speed for movement and rotation speed. Default value is 0.5. |
| CrawlingSpeedReduction | Factor of reduction on speed if state is fpCrawling. Values between 0.0 - 1.0 are allowed. Default value is 0.15. |
| CrouchingSpeedReduction | Factor of reduction on speed if state is fpCrouching. Values between 0.0 - 1.0 are allowed. Default value is 0.15. |
Boost
The boost mode getting triggered by the OnBoost event. By default boost mode is active by holding the left shift key down or the left shoulder button on your gamepad.
“RunningSpeedBoost” is multiplied with the current speed value. And the current speed value can be the normal speed or reduced speed by crawling and crouching.
If boost movement is active, states should contain the fpBoost flag.
Rotation Sideways
By default we rotate the controller by moving the mouse to left or right. This will implicitly rotates the camera view too. You can disable this behaviour by setting the “RotateOnSideways” property to true. And as best practice it is recommended to also deactivate the “MoveSideways” property.
Moving the camera up and down by mouse move will still be possible.
| Property | Description |
|---|---|
| RotateOnSideways | The left and right movement will be used to rotate the camera left to right, instead of strifing the character to the side. |
| SidewayRotationSpeed | Get or set speed of sideway rotation. A basis speed value applied to direction vector. Default value is 1. This value will only be recognized, if RotateOnSideways is enabled. |
| MoveSideways | Activate or deactivate to move character sideways on move-left/right hotkeys. |
Movement Drag Mode
We can also enable movement only when dragging is active. W-A-S-D or thumbstick movement behaviour will then no longer work.
Only if left mouse button is dragged (MovementDragModeButton == LButtonDown) the camera will be moved into view direction. This behaviour is sometimes used in strategy games when moving along a map.
And in case you want to invert the movement, you can use the “InvertMovementDragModeXAxis” and “InvertMovementDragModeYAxis” property.
| Property | Description |
|---|---|
| MovementDragMode | Get or set MovementDragMode value, which defines if camera movement is only been applied, if mouse-down button is active. Set MovementDragModeButton to define the mouse button to be used. Valid states are: LButtonDown, MButtonDown, RButtonDown |
| MovementDragModeButton | Get or set mouse button to be used if MovementDragMode is enabled. Valid states are: LButtonDown, MButtonDown, RButtonDown |
| InvertMovementDragModeXAxis | Invert the X-Axis direction value if MovementDragMode is enabled. |
| InvertMovementDragModeYAxis | Invert the Y-Axis direction value if MovementDragMode is enabled. |
Rotation Drag Mode
We can also enable rotation only when dragging is active. It's then no longer possible to rotate the camera without holding the drag button.
| Property | Description |
|---|---|
| RotationDragMode | Get or set RotationDragMode value, which defines if camera rotation is only been applied, if mouse-down button is active. Set RotationDragModeButton to define the mouse button to be used. Valid states are: LButtonDown, MButtonDown, RButtonDown |
| RotationDragModeButton | Get or set mouse button to be used if RotationDragMode is enabled. Valid states are: LButtonDown, MButtonDown, RButtonDown |
Rotation Around Center
In case you want to use the first person controller without a free camera rotation, but instead with a rotating first-person controller, use the “RotateAroundCenter” property.
WARNING: This property is currently a little bit buggy!
Hide Cursor
In many games you don't want to show the mouse cursor. On Windows platform we provide an easy to use property called “ShowCursor”, which enables or disables the displayed mouse cursor.
| Property | Description |
|---|---|
| ShowCursor | You can show/hide mouse cursor while first person controller is running. It is recommended to disable it already at design time. |
Size
A character controller is not only a virtual component, it actually should have a size. Therefor it is important to define a Width, Height and Depth for you controller, suitable to the expected character size.
It will be the basis for jumping, crawling, crouching and later for physics collision detection.
| Property | Description |
|---|---|
| Width | Width of the virtual character controller. |
| Height | Height of the virtual character controller. |
| Depth | Depth of the virtual character controller. |
Jumping
You can control the jumping height and the time it takes by the “JumpingAnimationTime” and the “JumpingHeight” property.
While jumping, states should contain the fpJumping state.
JumpingHeight is a multiplier for the character height. So a value of 2 means it can jump up the double of its size. And the animation time is given in seconds and tells the controller how long it takes for jumping.
| Property | Description |
|---|---|
| JumpingHeight | Multiplier of peek jumping height for the virtual character controller. |
| JumpingAnimationTime | Time in seconds the jumping up and down takes. |
Crouching
You can control switching to crouch-mode. While the “CrouchingAnimationTime” is the time it takes to enter or leave that mode, the “CrouchingHeight” is the final character size in that mode, based on it's original height.
When crouching is active states should contain the fpCrouching state.
CrouchingHeight is a multiplier for the character height. A value of 0.5 means, the character height in crouching is only half of it's full size. And the animation time is given in seconds and tells the controller how long it takes to get down to crouching or up from crouching. Internally an animation runs, that shrinks or grows the character size.
| Property | Description |
|---|---|
| CrouchingHeight | Multiplier for originl characters height. Will define the active crouching size. |
| CrouchingAnimationTime | Time in seconds the animation takes to enter or leave the crouching state. |
| CrouchingSpeedReduction | Multiplier to reduce regular speed while in crouching mode. |
Crawling
Besides the crouching mode, you can also control switching to crawling-mode. Crouching often is half of the size of the character, while crawling is less then a quater of it.
While the “CrawlingAnimationTime” is the time it takes to enter or leave that mode, the “CrawlingHeight” is the final character size in that mode, based on it's original height.
When crawling is active states should contain the fpCrawling state.
CrawlingHeight is a multiplier for the character height. A value of 0.25 means, the character height in crawling is only a quater of it's full size. And the animation time is given in seconds and tells the controller how long it takes to get down to crawling or up from crawling. Internally an animation runs, that shrinks or grows the character size.
| Property | Description |
|---|---|
| CrawlingHeight | Multiplier for originl characters height. Will define the active crawling size. |
| CrawlingAnimationTime | Time in seconds the animation takes to enter or leave the crawling state. |
| CrawlingSpeedReduction | Multiplier to reduce regular speed while in crawling mode. |
Push / Pull
Two states are not automatically handled, because developers always have to decide when pushing or pulling is activated.
When pushing is active states should contain the fpPushing state.
When pulling is active states should contain the fpPulling state.
| Method | Description |
|---|---|
| procedure Push(AEnabled : Boolean); | Manually activates/deactivates the pushing state and calls the OnPush event. |
| procedure Pull(AEnabled : Boolean); | Manually activates/deactivates the pulling state and calls the OnPull event. |
Default Behaviour
Finally there are 2 important properties to deactivate default behaviour of our character controllers.
| Property | Description |
|---|---|
| UseDefaultBehaviour | Will deactivate any automatic operation handling like jumping, crouching, crawling, moving and so on. But the user-specific callback events like OnMove, OnJump or OnCrawl and so on, are still getting called. |
| UseDefaultMovement | Allows to disable default movement of the controller. This has no influence on camera rotation. |
User-Friendly Events
For individual treatment you can disable or overwrite those predefined hotkeys. The basic character controller component catches all input events, handles them and throws back user-friendly events.
| Event | Callback | Description |
|---|---|---|
| OnIdle | TOnCharacterControllerEvent | OnIdle event getting raised when first person controller switches to idle mode. |
| OnMove | TOnCharacterControllerMoveEvent | OnMove event getting raised in doOnMoveForward, doOnMoveBackward, doOnMoveLeft, doOnMoveRight and DoOnGamePadThumbstickPos methods, used by keyboard hotkeys and gamepad thumbstick movement. |
| OnRotate | TOnCharacterControllerRotateEvent | OnRotate event getting raised if the view was rotated by DoOnGamePadThumbstickPos or DoOnMouseMove. |
| OnBoost | TOnCharacterControllerEvent | OnBoost event getting raised when boost mode was activated or deactivated. |
| OnCrouch | TOnCharacterControllerEvent | OnCrouch event getting raised when crouching was activated or deactivated. |
| OnCrawl | TOnCharacterControllerEvent | OnCrawl event getting raised when crawling was activated or deactivated. |
| OnJump | TOnCharacterControllerEvent | OnJump event getting raised when first person controller is jumping. |
| OnAim | TOnCharacterControllerEvent | OnAim event getting raised when aiming mode was activated or deactivated. |
| OnPush | TOnCharacterControllerEvent | OnPush event getting raised when pushing mode was activated or deactivated |
| OnPull | TOnCharacterControllerEvent | OnPull event getting raised when pulling mode was activated or deactivated. |
| OnCustomAction | TOnCharacterControllerHotKeyTriggered | OnCustomAction event getting raised by keyboard custom action hotkeys and gamepad buttons. |
| OnClick | TOnCharacterControllerHotKeyTriggered | OnClick event getting raised by clicking left, middle or right mouse button. |
| OnStart | TOnCharacterControllerEvent | OnStart event getting raised when start hotkey was activated. |
| OnMode | TOnCharacterControllerEvent | OnMode event getting raised when mode hotkey was activated. |
| OnBack | TOnCharacterControllerEvent | OnBack event getting raised when back hotkey was activated. |
| OnNavigate | TOnCharacterControllerHotKeyTriggered | OnNavigate event getting raised when menu navigation was triggered. |
| OnChangeSize | TNotifyEvent | Getting called, when leaving crouching or crawling mode. |
| OnHotKey | TOnCharacterControllerHotKeyTriggered | OnHotKey event getting raised when a registered hotkey was triggered. It's a central callback event for all hotkeys. Parallel to it hotkey specific events will be raised: OnIdle, OnMove, OnBoost, OnCrouch, OnJump, OnCustomAction, OnClick, OnStart, OnMode, OnBack and OnNavigate |
| OnTriggerPoint | TOnCharacterControllerTriggerPoint | If a TGorillaTriggerPointManager component was linked to the first person controller, a trigger-point check will automatically be performed on movement. If then a trigger-point is in reach, the OnTriggerPoint event will be raised. |
And the corresponding event method declarations look like:
| Name | Declaration |
|---|---|
| TOnCharacterControllerHotKeyTriggered | procedure(ASender : TObject; const AKind : TGorillaCharacterControllerHotKey; const AHotKey : TGorillaHotKeyItem; const AStates : TGorillaCharacterControllerStates; const AMode : TGorillaInputMode) of object; |
| TOnCharacterControllerMoveEvent | procedure(ASender : TObject; AKind : TGorillaCharacterControllerHotKey; ADir : TPoint3D; ACurrentSpeed : Single) of object; |
| TOnCharacterControllerRotateEvent | procedure(ASender : TObject; ACurrentRotation : TQuaternion3D; ANewRotation : TQuaternion3D; ADelta : TPointF) of object; |
| TOnCharacterControllerEvent | procedure(ASender : TObject; AState : TGorillaCharacterControllerState; AMode : TGorillaInputMode) of object; |
| TOnCharacterControllerTriggerPoint | procedure(ASender : TObject; AManager : TGorillaTriggerPointManager; APt : TGorillaTriggerPoint; ADist : Single) of object; |
FirstPerson Controller
The TGorillaFirstPersonController controls movement of a linked camera component in its basic settings. But you're allowed to add sub controls like a TGorillaModel to display arms or weapons as known in typical ego shooter games.
You can set up a firstperson controller at design-time or at runtime by:
[...]

  protected
    FInputCtrl : TGorillaInputController;
    FFirstPersonCtrl : TGorillaFirstPersonController;

[...]

uses
  Gorilla.Controller.Input.Types,
  Gorilla.Controller.Input.Character,
  Gorilla.Controller.Input.FirstPerson;

[...]

FInputCtrl := TGorillaInputController.Create(Self);
FInputCtrl.Supported := [TGorillaInputDeviceType.Keyboard, TGorillaInputDeviceType.Mouse];
FInputCtrl.Enabled := true;

FFirstPersonCtrl := TGorillaFirstPersonController.Create(FViewport);
FFirstPersonCtrl.Parent := FViewport;
FFirstPersonCtrl.InputController := FInputCtrl;
FFirstPersonCtrl.Camera := FCamera;
ThirdPerson Controller
The TGorillaThirdPersonController is an extension of the TGorillaFirstPersonController but changes camera movement. It's the typical character controller when having a character model with a top down look by camera.
[...]

  protected
    FInputCtrl : TGorillaInputController;
    FThirdPersonCtrl : TGorillaThirdPersonController;

[...]

uses
  Gorilla.Controller.Input.Types,
  Gorilla.Controller.Input.Character,
  Gorilla.Controller.Input.ThirdPerson;

[...]

FInputCtrl := TGorillaInputController.Create(Self);
FInputCtrl.Supported := [TGorillaInputDeviceType.Keyboard, TGorillaInputDeviceType.Mouse];
FInputCtrl.Enabled := true;

FThirdPersonCtrl := TGorillaThirdPersonController.Create(FViewport);
FThirdPersonCtrl.Parent := FViewport;
FThirdPersonCtrl.InputController := FInputCtrl;
FThirdPersonCtrl.Camera := FCamera;
Optionally linkable components
It's usual to handle different things during character controlling. So you'd like to check for special positions in 3D space and execute actions when getting triggered. Or you like to playback sounds on specific states or refer to a sound-map.
The following components are allowed to link to a character controller:
Physics Character Controller
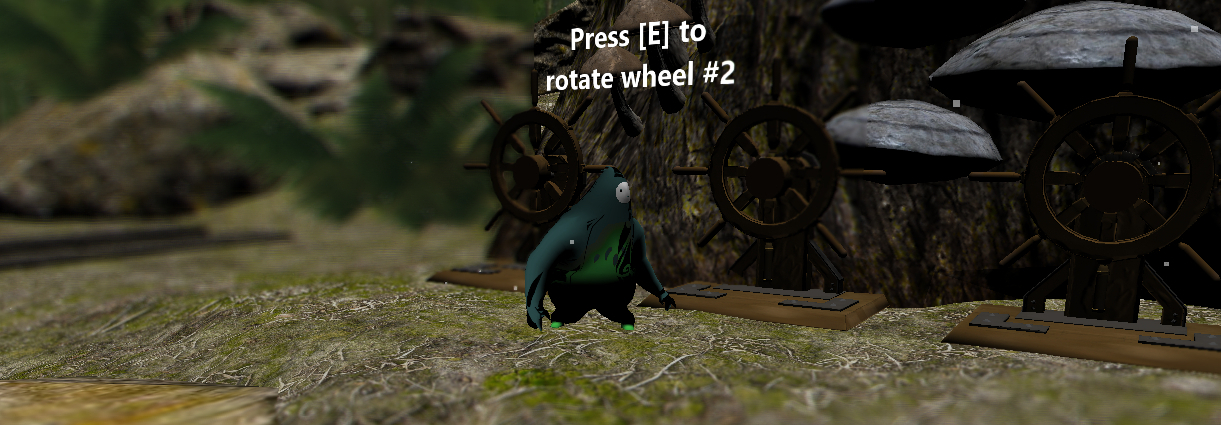
A TGorillaPhysicsCharacterController is a helper layer to manage physics engine, character controller and animation controller. The component handles all the complex management of collision detection and animation playback of a model on basis of a firstperson/thirdperson character controller. Without any programming it's possible to implement a game-typical character controlling, where animations switched automatically on different interactions. On top there is physics collision detection (capsule collider).
Besides easy-to-drop designtime handling, you can setup a physics character controller at runtime.
  [...]

  FAssetsManager : TGorillaAssetsManager;
  FMainPackage : TGorillaAssetsPackage;

  FPhysics : TGorillaPhysicsSystem;
  FAudioManager : TGorillaFMODAudioManager;

  FCharacter : TGorillaModel;
  FPhysCtrl : TGorillaPhysicsCharacterController;
  FAnimCtrl : TGorillaAnimationController;
  FInputCtrl : TGorillaInputController;
  FThirdPersonCtrl : TGorillaThirdPersonController;
  FAudioCtrl : TGorillaAudioManagerController;
  FTriggerPoints : TGorillaTriggerPointManager;

  [...]

procedure TGameWindow.LoadCharacter(const AAssets : String);
var LPath : String;
    j : Integer;
    LLay : TGorillaAnimationTransitionLayer;
    LTP : TGorillaTriggerPoint;
begin
  // setup character assets path
  LPath := AAssets + IncludeTrailingPathDelimiter('mymodel');

  // create physics character controller (PCC)
  // a PCC is able to connect a character controller with a physics system
  // because with the terrain a collider was added, so that we can walk
  // with our character on it. the PCC will automatically add a capsule collider
  // for collision detection
  FPhysCtrl := TGorillaPhysicsCharacterController.Create(FViewport);
  FPhysCtrl.Parent := FViewport;
  // here we can control the gravity - default value = 25
  FPhysCtrl.GravityScale := 3;

  // create character model
  // this will just be a visual instance for our character
  // the controlling will be done by the physics character controller and the
  // third person character controller
  FCharacter := TGorillaModel.LoadNewModelFromFile(FPhysCtrl, FMainPackage,
        LPath + 'mymodel.dae', []);
  FCharacter.Parent := FPhysCtrl;
  // we don't want to interact with the model - so we deactivate any raycast tests.
  FCharacter.SetHitTestValue(false);
  // we always want to see our character, so we disable frustum culling check
  // nevertheless this should not be necessary
  FCharacter.FrustumCullingCheck := false;
  // position character model inside of PCC capsule collider (may be obsolete - depending on your model)
  FCharacter.RotationAngle.Point := Point3D(-180, 90, 0);
  FCharacter.Position.Point := Point3D(0, 8, 0);
  FCharacter.Scale.Point := Point3D(0.75, 0.75, 0.75);

  // load all animations used by animation controller
  FCharacter.AddAnimationFromFile(LPath + 'mymodel-idle.dae');
  FCharacter.AddAnimationFromFile(LPath + 'mymodel-walk-forward.dae');
  FCharacter.AddAnimationFromFile(LPath + 'mymodel-walk-backwards.dae');
  FCharacter.AddAnimationFromFile(LPath + 'mymodel-walk-left.dae');
  FCharacter.AddAnimationFromFile(LPath + 'mymodel-walk-right.dae');
  FCharacter.AddAnimationFromFile(LPath + 'mymodel-run-forward.dae');
  FCharacter.AddAnimationFromFile(LPath + 'mymodel-run-backwards.dae');
  FCharacter.AddAnimationFromFile(LPath + 'mymodel-run-left.dae');
  FCharacter.AddAnimationFromFile(LPath + 'mymodel-run-right.dae');

  [...]

  // we start the first animation in our model - this should be the basis animation
  // inside of the first model file.
  if Assigned(FCharacter.AnimationManager) and Assigned(FCharacter.AnimationManager.Current) then
    FCharacter.AnimationManager.Current.Start();

  // animation controller setup
  // create animation controller for handling animation transitions
  // animation transitions define how to switch from one animation to another
  // and which inputs / hotkeys are triggering
  FAnimCtrl := TGorillaAnimationController.Create(FViewport);
  // link the model to the animation controller, to apply animation transitions to
  FAnimCtrl.Model := FCharacter;

  // add all defined animation transitions
  LLay := FAnimCtrl.AddLayer('WalkingAnimations');
  LLay.AddTransition('idle-forward > walk-forward', 'mymodel-idle.dae', 'mymodel-walk-forward.dae', true, KeyboardMoveForward, [fpMoving], tmImmediatly);
  LLay.AddTransition('idle-backward > walk-backward', 'mymodel-idle.dae', 'mymodel-walk-backward.dae', true, KeyboardMoveBackward, [fpMoving], tmImmediatly);
  [...]

  // set the default animation to be played at the beginning
  FAnimCtrl.DefaultAnimation := 'mymodel-idle.dae'; // the filename of your idle animation

  // create an audio manager controller to automatically playback sounds on
  // specific hotkey actions
  FAudioCtrl := TGorillaAudioManagerController.Create(Self);
  FAudioCtrl.AudioManager := Self.FAudioManager;
  FAudioCtrl.AddHotKeyMapping('RUN_FORWARD',  SOUND_RUN,
        TGorillaCharacterControllerHotKey.KeyboardMoveForward, [fpMoving,fpBoost]);
  FAudioCtrl.AddHotKeyMapping('RUN_BACKWARD', SOUND_RUN,
        TGorillaCharacterControllerHotKey.KeyboardMoveBackward, [fpMoving,fpBoost]);
  FAudioCtrl.AddHotKeyMapping('WALK_FORWARD',  SOUND_WALK,
        TGorillaCharacterControllerHotKey.KeyboardMoveForward, [fpMoving]);
  FAudioCtrl.AddHotKeyMapping('WALK_BACKWARD', SOUND_WALK,
        TGorillaCharacterControllerHotKey.KeyboardMoveBackward, [fpMoving]);

  // create a trigger points manager and some coordinates to be triggered
  FTriggerPoints := TGorillaTriggerPointManager.Create(Self);
  // we don't want to check against camera, but againts the character model
  FTriggerPoints.RelatedControl := FCharacter;
  FTriggerPoints.Enabled := true;

  // wheel #1 trigger point
  LTP := FTriggerPoints.AddTriggerPoint('Wheel1', Point3D(-10, 0, 10), 0.25, 30);
  LTP.LookInDirection := false;
  LTP.Kind := TGorillaTriggerPointKind.StaticTriggerPoint;
  LTP.Data := TValue.From<String>('Press [E] to rotate wheel #1');
  LTP.Tag  := 1;
  LTP.OnTriggered := DoOnWheelTriggered;
  LTP.OnUnTriggered := DoOnWheelUnTriggered;

  // wheel #2 trigger point
  LTP := FTriggerPoints.AddTriggerPoint('Wheel2', Point3D(15, 0, -20), 0.25, 30);
  LTP.LookInDirection := false;
  LTP.Kind := TGorillaTriggerPointKind.StaticTriggerPoint;
  LTP.Data := TValue.From<String>('Press [E] to rotate wheel #2');
  LTP.Tag  := 2;
  LTP.OnTriggered := DoOnWheelTriggered;
  LTP.OnUnTriggered := DoOnWheelUnTriggered;

  // position the physics controller in 3D physics space - we let the capsule
  // collider drop from -75.0 onto the terrain.
  FPhysCtrl.Position.Point := Point3D(0, -5, 0);
  // link physics controller with character
  FPhysCtrl.Model := FCharacter;
  // resize the capsule collider for better scaled size regarding the scene size
  FPhysCtrl.SetSize(6, 16, 6);

  // create a third-person controller
  // this is the basic input handler for characters
  // this will control movement depending on inputs (by the input controller)
  FThirdPersonCtrl := TGorillaThirdPersonController.Create(FPhysCtrl);
  // attach the character controller to the physics character controller (PCC)
  // so it can automatically move it on interaction
  FThirdPersonCtrl.Parent := FPhysCtrl;
  // link the camera to the controller for automatic camera movement
  FThirdPersonCtrl.Camera := FCamera;
  // link the input controller to process all keyboard inputs, to let the
  // character move, jump or whatever
  FThirdPersonCtrl.InputController := FInputCtrl;
  // link the audio manager controller for automatic sound playback on hotkeys
  FThirdPersonCtrl.AudioManagerController := FAudioCtrl;
  // link triggerpoints manager for auto-detection of game coordinates
  FThirdPersonCtrl.TriggerPoints := FTriggerPoints;

  // deactivate default behaviour, because we're attaching the character controller
  // to the physics character controller and the physics system
  // we need to deactivate to allow physics system interaction with the character
  FThirdPersonCtrl.UseDefaultMovement := false;
  // reduce default speed, because of large scene scale
  FThirdPersonCtrl.Speed := 15;

  // set camera position a bit more far away for better optics
  FCamera.Position.Point := Point3D(25, 0, -20);
  FCamera.Target := FCharacter;

  // link animation controller to physics character controller (PCC)
  // the PCC will then automatically dispatch all input events to the animation
  // controller to playback the correct animation transition.
  FPhysCtrl.AnimationController := FAnimCtrl;
  // link the physics system to PCC, to interact with physics world (terrain and objects)
  FPhysCtrl.Physics := FPhysics;
  // link the character controller to PCC, to let the PCC know, what to control.
  FPhysCtrl.Controller := FThirdPersonCtrl;
end;
Movement
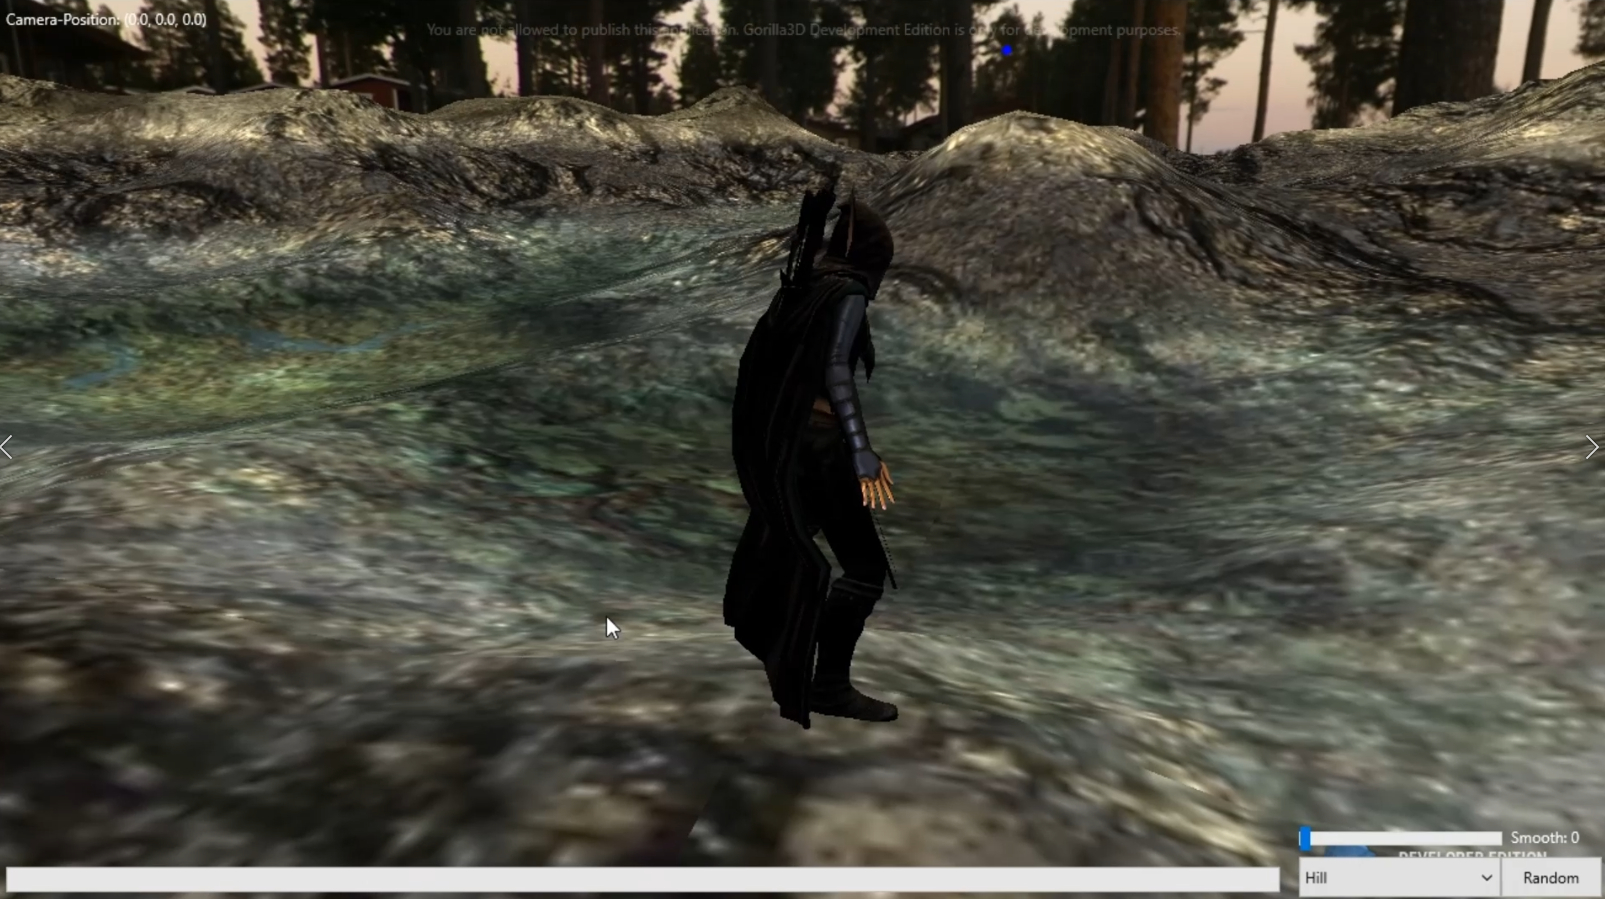
Since the latest version of Gorilla3D (v0.8.3.1995) we support kinematic character movement. While previous versions worked completely on physics computation, the latest change added a more stable way.
The true physics collision detection for characters works, but has bad sideeffects. The most serious problem was stuttering characters which bounced off the terrain. Also it was impossible to “climb” up steep hills because physics always dragged you down again. Even if this is more realistic, the usability was horrible for classic character movement.
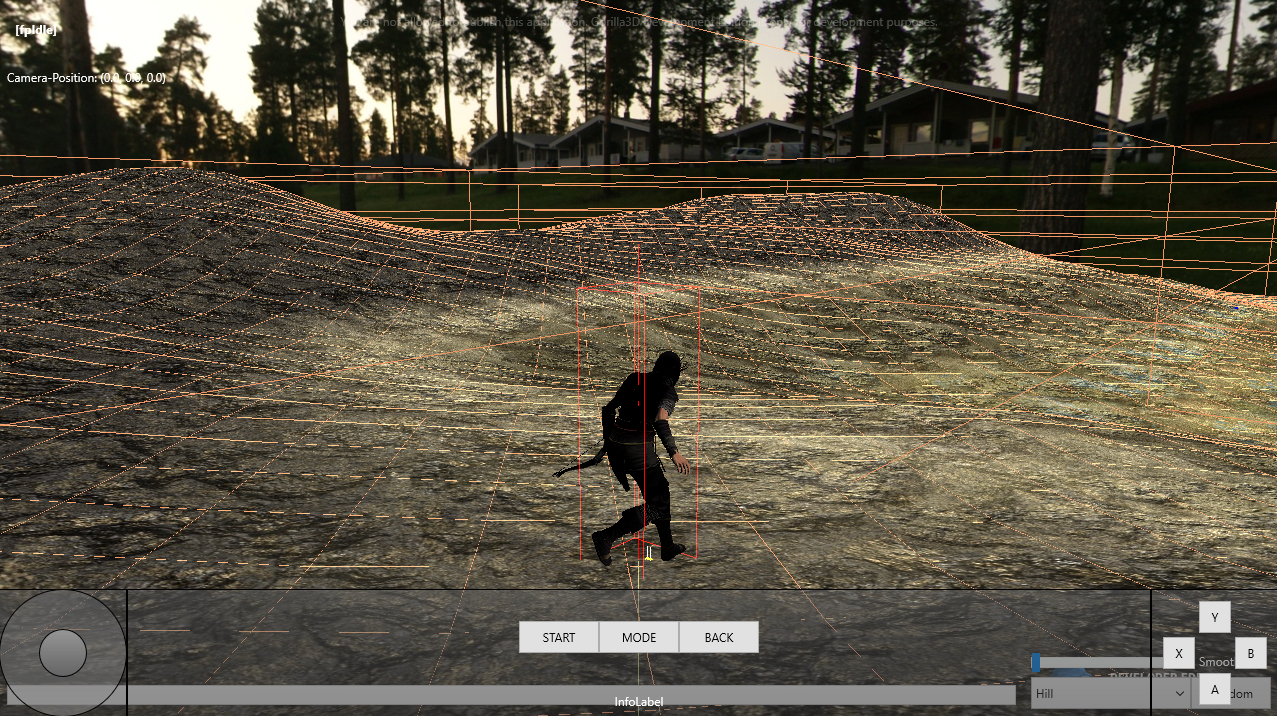
So in the latest component state the “UseRayCasting” property is activated. This changes the character controller from a dynamic rigid body to a kinematic body. Here we now cast a ray to detect the current position on objects instead of letting physics do the job. Nevertheless interaction with static or dynamic objects is still available.
Remark: In case you need the old behaviour, just switch “UseRayCasting” to FALSE.
Control you raycast-movement by some properties like Slop, RayDirection and RayOffset. Especially the slopping value allows you to control f.e. the max. height of stairs to be able to walk.
| Property | Description |
|---|---|
| Slop | This only affects computation if UseRayCasting is enabled. The slop value is the maximum height a movement ray direction. Adjust this value to your specific scene, especially when walking of stairs or similar static objects. Default value is 0.5. |
| RayDirection | The RayDirection defines in which direction the controller will be adjusted. Default direction is (0, 1, 0), which means downwards. |
| RayOffset | Get or set ray offset from where the raycasting is started. The offset will be computed from current physics character controller position. |
Next step: Prefabs